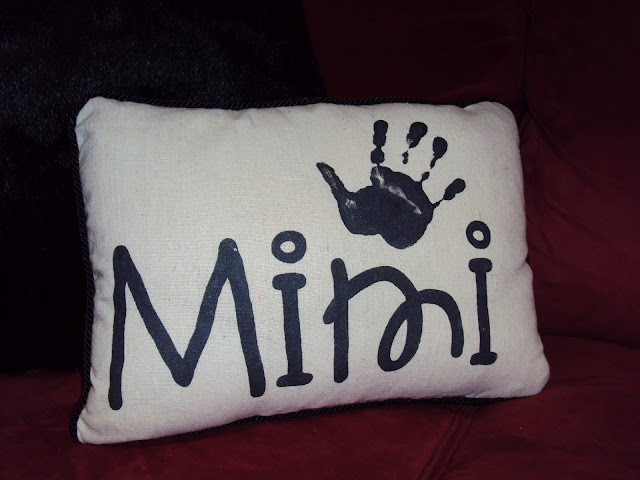
I have been experimenting with painting on fabric. I'm constantly doing some sort of project with my five year old niece and thought this pillow would be a perfect gift for her to give to my mother on her birthday. You can find TONS of "grandma" and "grandpa" stuff out there but Kylie calls my mom "Mimi" and that isn't so easy to find. I decided that we would make something on our own.
Supplies
Pillow case (purchased or made...I made this one myself)
Pillow
Cardstock or vinyl (to make stencil from) or a pre-made stencil of your choice
Fabric paint
Paint brush
Scissors (I cheated and used my Cricut)
Tape
Instructions
- If you choose to make your own stencil, first cut your words or graphic out of heavy cardstock or vinyl. I used my Cricut and cut my word out of Contact Paper.
- Place your stencil onto the part of your pillow fabric or case that you wish to paint. My stencil stuck to the fabric because I was using Contact Paper. If you use a plastic or paper stencil you may wish to tape it into place to keep it from moving.
- Please remember that most fabrics are thin enough that your paint will bleed through. Be sure to place something under the fabric to keep any bleeding from staining your workspace.
- Lightly apply paint in a straight up and down motion. This will keep you from pulling the threads of the fabric and distorting the open areas of your stencil.
- Be careful not to apply heavy amounts of paint at one time. Doing so may result in the fabric absorbing excess paint and seeping beyond the edges of your stencil.
- Carefully remove your stencil once you have reach the desired paint coverage. I wanted a solid print with this pillow but you may choose to go with a lighter amount of paint, leaving some of the fabric exposed.
- I wanted to make this pillow even more personal by having Kylie stamp her handprint onto the pillow. We used the same fabric paint.
This was a right-before-bedtime project and clearly not so much a planned blog photo op...we were in our pj's and headed to bed. LOL
- Follow the instructions on your fabric paint bottle to allow sufficient dry time. Once dry, simply complete your pillow by sewing it together or adding the pillow if you're using a premade pillowcase.
This made for a really fun, personalized gift. My first trial pillow is shown in the pic below. These can be made as simple or as elaborate as you'd like. These were also the first pillows I've ever made with piping. I'll eventually get that project posted.


No comments:
Post a Comment