Showing posts with label handmade pillow. Show all posts

Wednesday, March 14, 2012

Yo-Yo Quilt Pillow

I was fortunate to have a really close relationship with my grandma.  We spent a lot of time together when I was young.  She was always sewing and crocheting...doing a little of everything.  I learned how to do so many of these things because of the time we spent together.

I am the more sentimental one in my family and I tend to inherit belongings and such that are passed around.  Not too long ago I was doing some purging in my basement and I ran across a tote full of things I wasn't aware I had.  Grandma was a pastor and this tote had pads of paper with sermon notes, pens from her desk...a little bit of everything.  Down under all of the stuff I found pieces of a yo-yo quilt she had started and never finished.  She would work on that quilt while she set for hours a day, visiting grandpa in the nursing home.  She used a butter dish lid as her pattern for the pieces to the quilt.  I helped her trace and cut many pieces for those quilts.

There were a couple of whole sections in the tote (even one section with her threaded needle still hooked on) as well as a few half finished pieces.  I love making projects with sentimental value and decided to take the partial pieces of quilt section apart and make them into pillows to give to my mother and two aunts. 


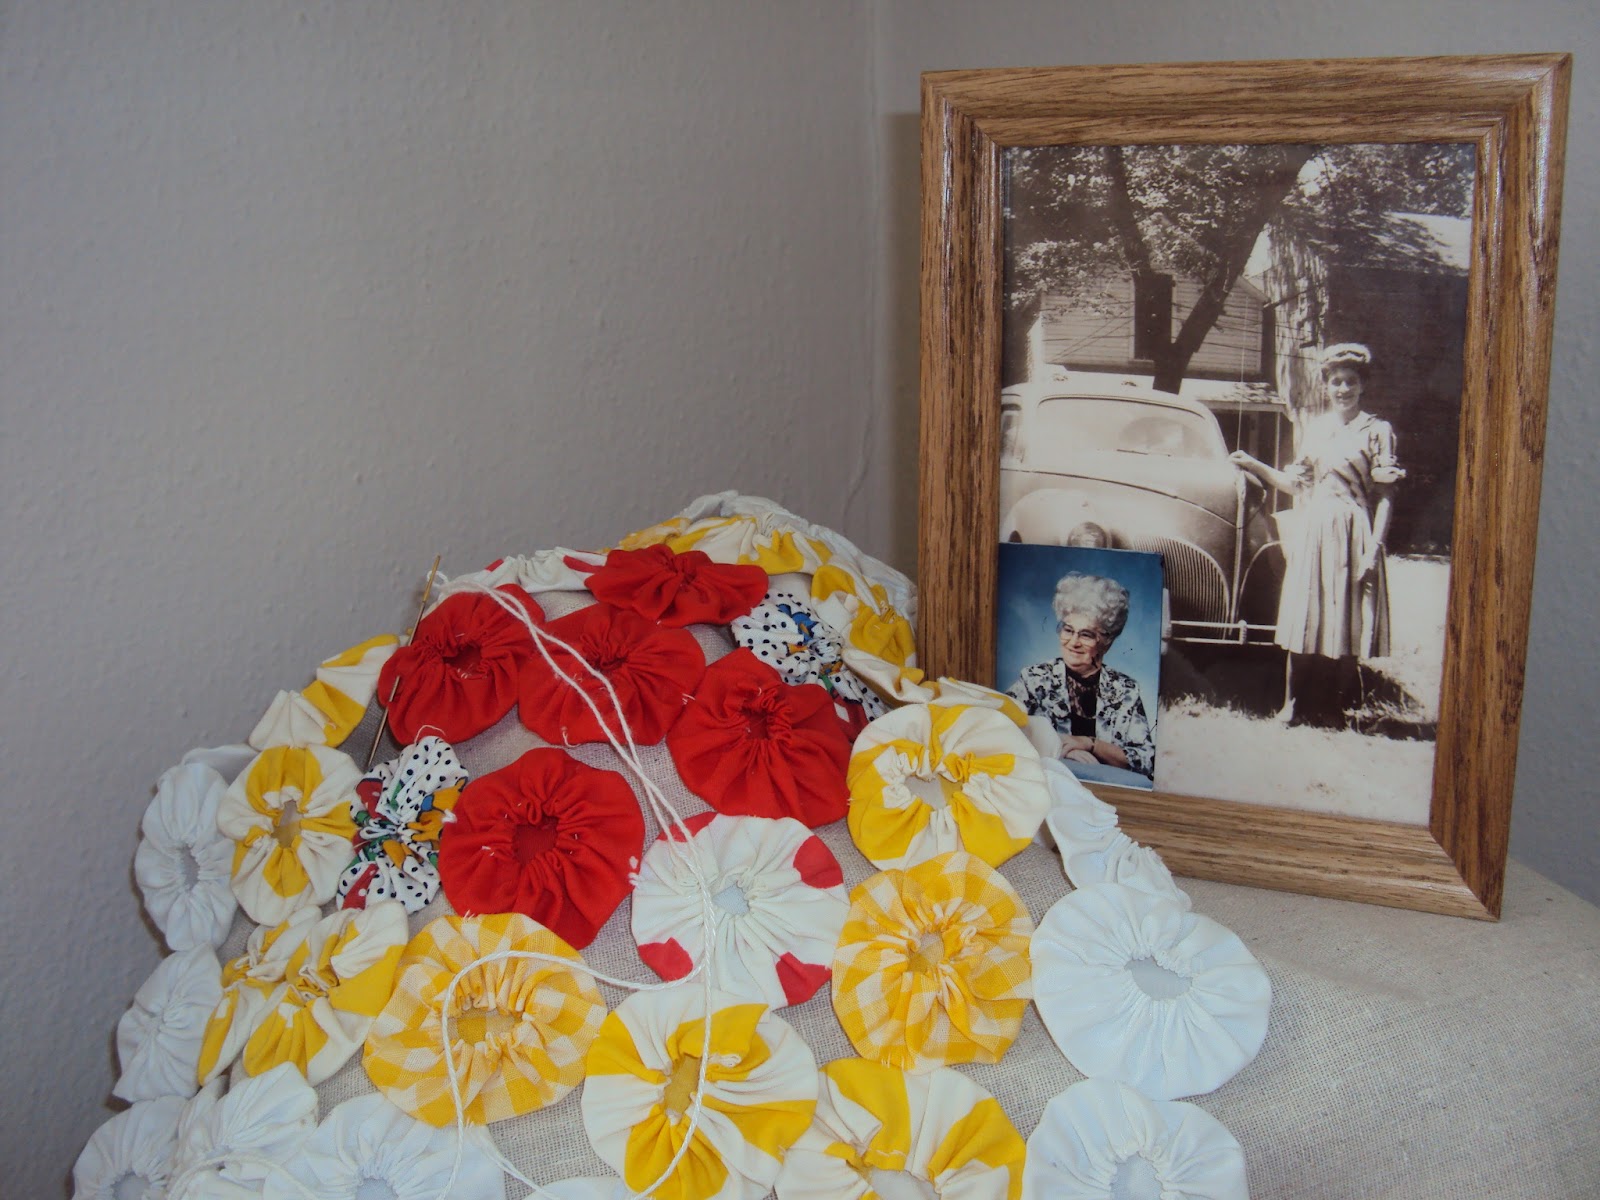
I'm not sure that I'd have the patience to make these circular pieces myself but I have found that some craft stores sell pre-made yo-yo pieces.  If you'd like to make your own Yo-Yo Flower Pillow you can either make or purchase the pieces.

Supplies
Pillow case (either purchased or made)
Yo-yo pieces
Green ribbon for stems
Green fabric for leaves
Scissors
Sewing machine
Thread and needle

Instructions
  • Decide the layout of your flowers by placing the pieces on your pillow front
  • Do the same with your green ribbon stems.
  • Remove yo-yo pieces and sew down your ribbon stems on the sewing machine.  I adjusted my machine to a wide zigzag stich.
  • Trim the excess ribbon that hangs over the edge of your pillow.
  • Place your yo-yo pieces at the top of each stem and stich them down.  I used a simple tack stich around the outside edge of the piece.  I put about five stiches around each piece to keep them laying flat when the pillow is inserted.

  • Once completed, sew pillow together and stuff.

Saturday, March 3, 2012

Personalized Painted Pillows

I have been working on a pile of different pillow projects.  I've started several and have been struggling to find time to finish them up.  Part of this one was for a gift for my mother (who's birthday was last week).  I was sewing the night before in order to get it done in time to give her.  Typical for any of my projects with a time deadline...LOL

I have been experimenting with painting on fabric.  I'm constantly doing some sort of project with my five year old niece and thought this pillow would be a perfect gift for her to give to my mother on her birthday.  You can find TONS of "grandma" and "grandpa" stuff out there but Kylie calls my mom "Mimi" and that isn't so easy to find.  I decided that we would make something on our own.

Supplies
Pillow case (purchased or made...I made this one myself)
Pillow
Cardstock or vinyl (to make stencil from) or a pre-made stencil of your choice
Fabric paint
Paint brush
Scissors (I cheated and used my Cricut)
Tape

Instructions
  • If you choose to make your own stencil, first cut your words or graphic out of heavy cardstock or vinyl.  I used my Cricut and cut my word out of Contact Paper. 
  • Place your stencil onto the part of your pillow fabric or case that you wish to paint.  My stencil stuck to the fabric because I was using Contact Paper.  If you use a plastic or paper stencil you may wish to tape it into place to keep it from moving.
    • Please remember that most fabrics are thin enough that your paint will bleed through.  Be sure to place something under the fabric to keep any bleeding from staining your workspace.
  • Lightly apply paint in a straight up and down motion.  This will keep you from pulling the threads of the fabric and distorting the open areas of your stencil.
    • Be careful not to apply heavy amounts of paint at one time.  Doing so may result in the fabric absorbing excess paint and seeping beyond the edges of your stencil. 
  • Carefully remove your stencil once you have reach the desired paint coverage.  I wanted a solid print with this pillow but you may choose to go with a lighter amount of paint, leaving some of the fabric exposed.
  • I wanted to make this pillow even more personal by having Kylie stamp her handprint onto the pillow.  We used the same fabric paint.
This was a right-before-bedtime project and clearly not so much a planned blog photo op...we were in our pj's and headed to bed.  LOL
  • Follow the instructions on your fabric paint bottle to allow sufficient dry time.  Once dry, simply complete your pillow by sewing it together or adding the pillow if you're using a premade pillowcase.

This made for a really fun, personalized gift.  My first trial pillow is shown in the pic below.  These can be made as simple or as elaborate as you'd like.  These were also the first pillows I've ever made with piping.  I'll eventually get that project posted. 

Sunday, February 5, 2012

Scrabble Piece Pillows

I've recently become addicted to the game WORDS WITH FRIENDS on my phone.  I had already seen an image where someone had cut large wood squares, painted them to look like Scrabble pieces and put them on the wall spelling out words.  I decided to make pillows. 

These can be made to spell words, initials, favorite numbers, etc..  Be creative with your choices in fabric as well as letters/numbers.  Remember, if you can't sew, find someone who can.  You can prep all the stuff (including the cutting and painting) and then pass them on to someone to finish them up. 


I have a five year old niece whom I adore.  Her name is Kylie, hence the reason so many of my trial projects have a "K" on them.  She gets lots of cool things after I've made and posted them online.  She's my little test market...LOL


These are super easy square pillows that I painted on using a stencil.  Of course I remembered having a Cricut cartridge that cuts out Scrabble like blocks...so I cheated and had the Cricut do my cutting.  You can easily make these by either purchasing some letter stencils or printing your own letters and numbers and cutting out your own paper stencil.

Supplies
Fabric
Pillow form or stuffing (I stuffed these)
Stencil (I cut mine on cardstock)
Tape
Paint (preferably fabric paint)
Brush
Sewing machine & tread (unless you're commissioning a friend to sew for you)

Instructions
  • Cut two pieces of fabric to either fit the size of your pillow form or to the size of pillow you wish to stuff.
  • Also prepare your stencil.  I cut my with the Cricut but you can easily purchase stencils or cut your own from a piece of cardstock
  • Prepare for painting
    • Tape one piece of your fabric (the front) to a stable surface
    • Tape your stencil(s) to your fabric.  This will keep everything secure while painting.

  • Carefully begin painting your pillow.  Do no use brush strokes as it may cause the fabric to stretch and pull from underneath the stencil.  Instead, lightly load your brush with paint and tap the surface.  Be careful not to use too much paint on your brush at one time.  You don't want the paint to soak into the fabric and spread under the stencil.

  • Once you've applied a sufficient amount of paint, gently remove your stencil.

  • Allow the paint to dry as instructed by the paint directions.
  • Place the painted front piece facing towards the back piece and stitch around on a sewing machine.  Be sure to leave an sufficient opening at the bottom of you pillow to allow for stuffing.
  • If you didn't cut rounded edges on your fabric, take your scissors and carefully round off the corners after the pieces have been stitched together.  this will take some of the bulkiness out when you turn the piece inside out.
  • Turn the piece inside out and begin stuffing.
  • Sew up the opening and your Scrabble Piece Pillow is complete.